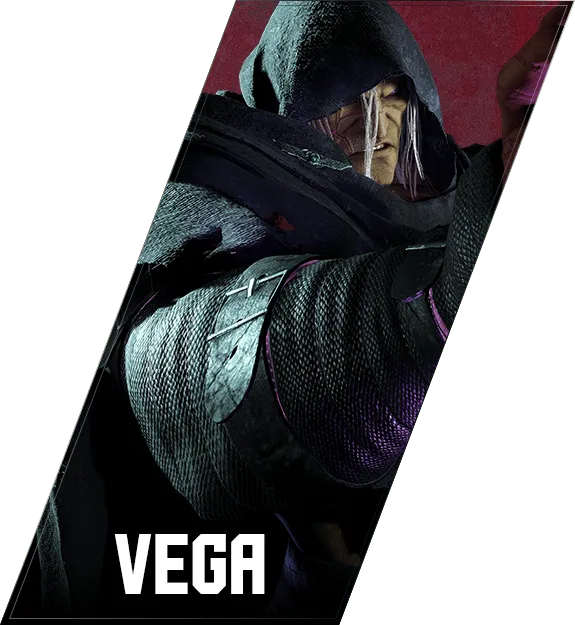

ベガ
M.Bison — 대책
Key Info
- Sustained overhead with combo: 6HP (Psycho Hammer)
- Defense
- No invincible OD reversal
- 2HP (Psycho Upper): 10F startup anti-air invincible normal
- SA1 Knee Press Nightmare (236236K): 10F startup, no projectile invincibility
- SA2 Psycho Punisher (214214K): 26F startup, projectile invincible
- SA3 Unlimited Psycho Crusher (236236P): 10F startup
- Plus-on-block moves
- HP: +1 on block
- 4HK (Evil Knee): +1 on block
- [2]8K→P (Devil Reverse): +4 or more
- [2]8K→K→P (Somersault Skull Diver): +3 or more
- [2]8K→KK→K (OD Head Press): +5 or more
Neutral Game (Focus Points)
- Use neutral jumps occasionally — you need to put risk on his Double Knee Press and heavy normals. Make it a habit to throw out neutral jumps
- Jump in occasionally — M.Bison's anti-air is mostly normals, so crossup and empty jumps are effective on offense
- Stay aware of low blocks — getting hit by 2MK allows him to plant a mine, and three bad reads can end the round. Commit to blocking low more than usual
- Understand quick-rise vs back-rise and use them deliberately — especially in the M.Bison matchup, denying easy oki matters. Learn which combo enders disable his walk shimmy on quick-rise and memorize all of them
- Keep a projectile option in mind — M.Bison has no projectile invincibility outside SA3. Projectile-based characters can consistently build Drive Gauge advantage by layering fireballs. Research the optimal timing for your character
- Keep a safe jump option in mind — all of M.Bison's Super Arts are 10F or slower. Every character can safely time a 5F light normal as a meaty, so keep this option available at key moments
- When a mine is planted, consider Drive Reversal — blocking any of his specials with a mine active detonates it and gives him huge advantage. After a mine detonation, blocking his heavy normals bleeds your gauge and puts you in a losing position. Use Drive Reversal to interrupt at the detonation
Mine
A bomb is placed on the opponent via 214P.
If a strike hits while the mine is active, it detonates and increases combo damage.
If a special move is blocked while the mine is active, it detonates and guarantees continued pressure.
Psycho Crusher Attack (Mine Detonation)
- [With Psycho Mine][4]6LP: M.Bison +6 on block
- [With Psycho Mine][4]6MP: M.Bison +6 on block
- [With Psycho Mine][4]6HP: M.Bison +5 on block
- [With Psycho Mine][4]6PP: M.Bison +10 on block
Backfist Combo (Mine Detonation)
- [With Psycho Mine]214LP: M.Bison +9 on block
- [With Psycho Mine]214MP: M.Bison +9 on block
- [With Psycho Mine]214HP: M.Bison +9 on block
- [With Psycho Mine]214PP (OD): M.Bison -3 on block (no punish even on detonation)
Recommended Counter
- If you block it
- 4HK (Evil Knee) beats all mash attempts, so blocking drains your Drive Gauge rapidly
- Use Drive Reversal
- If you read the follow-up
- Drive Impact is guaranteed — go for it when you read the option
- Especially effective after landing a throw
214P
Understand the oki structure that follows each version.
- 214LP: M.Bison -14 on block
- 214MP: M.Bison -15 on block
- 214HP: M.Bison -15 on block
Recommended Counter
After 214LP or 214MP hits (M.Bison +20–21)
- Quick-rise: 4HK (Evil Knee) lands as meaty / throw does not connect
- Back-rise: neither throw nor strike connects (even MP leaves 8F+ gap)
Take quick-rise and mash with a long-reach medium normal.
After 214HP hits (M.Bison +31)
- Quick-rise: M.Bison's walk shimmy is impossible when he uses Drive Rush
- Back-rise: throw AND 4HK both land — dangerous
Warning
After 214LP or 214MP — if he reads your fastest reversal attempt
He may use 236K (Double Knee Press) to land a Punish Counter.
After 214LP or 214MP — if he uses 236K to punish your reversal
Place a neutral jump to avoid it.
After 214HP — against quick-rise
M.Bison can shimmy with Drive Rush → 2LP or LK. Confirming the tech direction is difficult, so in practice he usually forgoes this oki option.
236K (Double Knee Press)
Normal versions:
- 236LK: M.Bison -5 on block → 5F punish guaranteed
- 236MK: M.Bison -5 on block → 5F punish guaranteed
- 236HK: M.Bison -4 on block → 4F punish guaranteed
OD version:
- 236KK: M.Bison -15 on block → punish with a heavy starter
Recommended Counter
- In neutral: mix in neutral jumps. After a throw-tech especially, Double Knee Press tends to hit at tip range — many M.Bison players mash it there
- On block: the punish changes by strength, so memorize each. Always take the 5F punish on 236LK and 236MK
[2]8K (Shadow Rise)
M.Bison's aerial ambush tool. Branches into:
- [2]8K→K (Head Press)
- [2]8K→K→P (Somersault Skull Diver)
- [2]8K→P (Devil Reverse)
Recommended Counter
- Avoid invincible reversal anti-airs — the branches shift his axis enough to make them unreliable
- Air-to-air jump normals are recommended — even losing the air-to-air has low cost
- After blocking [2]8K→K→P: a back-jumping crossup attack scores a low-risk knockdown
- Air-throw characters can air-throw instead
- M.Bison has nothing that punishes a back-jump, so this always wins
[4]6P (Psycho Crusher Attack)
M.Bison's advancing move — used as combo ender and projectile counter.
Normal versions:
- [4]6LP: M.Bison -20 on block → punish with heavy starter
- [4]6MP: M.Bison -20 on block → punish with heavy starter
- [4]6HP: M.Bison -23 on block → punish with heavy starter
OD version:
- [4]6PP: M.Bison -3 on block — no guaranteed punish
With Psycho Mine active (mine planted by 214P):
- [with Psycho Mine][4]6LP: M.Bison +6 on block (mine detonates)
- [with Psycho Mine][4]6MP: M.Bison +6 on block
- [with Psycho Mine][4]6HP: M.Bison +5 on block
- [with Psycho Mine][4]6PP: M.Bison +10 on block
Recommended Counter
Normal versions are -20 to -23 on block — always take max combo. OD version (-3) has no punish, so just wait and watch. With mine active, blocking gives M.Bison +5 to +10 — use Drive Reversal to interrupt as soon as the mine detonates.
After [4]6LP or [4]6MP hits (M.Bison +24)
- Forward dash gives +5 oki
- Oki applies regardless of rise direction — take quick-rise to hold stage position
- Walk shimmy available (not on large characters)
After [4]6HP hits (M.Bison +14)
- Back-rise denies the oki entirely
- If he uses Drive Rush to chase, an invincible reversal is guaranteed
After [4]6PP (OD) hits (M.Bison +35)
- Walking puts a meaty throw on you
- Use an invincible SA or OD reversal to escape
Cancel Drive Rush → after 2LP mixup
M.Bison's standard Cancel Drive Rush sequence. After blocking his Drive Rush 2LP:
- 4HK (Evil Knee): beaten by fastest light mash / escapable by back-jump
- MP: beaten by fastest light mash / escapable by back-jump
- 2MP: trades with fastest light mash — some characters cannot combo after the trade (Rashid, Kimberly, Akuma, Blanka, etc.)
- 2LK→LP: mash loses
- Throw: mash loses
Recommended Counter
Back-jump
2MP and 2LK→LP connect, but damage is low. MP and Evil Knee can be eaten while jumping away.
The video below shows:
- Drive Rush → 2LP → 4HK
- Drive Rush → 2LP → MP
Fastest mash (4F standing light) — character-dependent
For Rashid, Kimberly, Akuma, Blanka, etc., the trade still leaves M.Bison without a combo. Check whether your character's 4F normal wins this situation.
The video below shows 4HK, MP, and 2MP recorded:
- Drive Rush → 2LP → 4HK
- Drive Rush → 2LP → MP
- Drive Rush → 2LP → 2MP
3HK (Hover Kick)
Hard to react to, but once you block it you are guaranteed at least 14F punish regardless of how late the active frames connect. Always take the full punish.
Recommended Counter
- On block: start with a heavy normal for maximum damage
4HK (Evil Knee)
M.Bison is +1 on block. Used in wake-up pressure.
Recommended Counter
- On block: avoid high-risk reversals — the +1 situation is not strong enough to justify mashing throw or invincible moves. If you want to challenge, use a fast light normal instead
- After Drive Rush → 4HK on block: delayed Parry
- 4HK can beat mash attempts, so time your Parry right as the follow-up 4HK is expected — avoids a Punish Counter throw while giving you a chance at a Just Parry
The video below shows:
- Throw → Drive Rush 4HK → 4HK
- Throw → Drive Rush 4HK → throw
It takes practice, but start by delaying your Parry loosely — it is fine to be early at first.
Target Combo
M.Bison's Target Combo is a low/overhead mixup — no fuzzy option exists, so you have to read it.
- MP→6HP (Shadow Hammer): M.Bison -3 on block, outside throw range
- MP→2HK (Shadow Spear): M.Bison -3 on block, outside throw range
Recommended Counter
After blocking either branch, M.Bison is -3 and out of throw range:
- Walk-in throw: walk for roughly 10F before the throw input — too little walk means you whiff and eat a Punish Counter, so commit fully
- 2MK: beats M.Bison's walk-in throw if he tries to grab your walk
- Heavy normal: some M.Bison players backdash and press a light normal to stuff your walk-in — a heavy normal can catch this
After Forward Throw (LPLK — Deadly Through)
M.Bison is +21.
Recommended Counter
Quick-rise
- With Drive Rush, throw connects as a meaty
- With Drive Rush, walk shimmy is impossible
Back-rise
- Throw no longer connects as a meaty
- With Drive Rush, 4HK (Evil Knee) lands as a meaty
Best option: back-rise → fuzzy Parry → buffer Drive Reversal
Many M.Bison players default to meaty 4HK because throw whiffs on back-rise. Use back-rise to push 4HK off, then Parry into Drive Reversal.
The video below shows fuzzy Parry into Drive Reversal after confirming 4HK:
After Back Throw (4LPLK — Death Tower)
M.Bison is +18. Drive Rush is required to run oki.
Recommended Counter
- In midscreen: quick-rise is the stable choice — no oki follows without Drive Rush
- If you see a Drive Rush on quick-rise, an invincible move with 8F or fewer startup is guaranteed